|
How
to process a sequence affected by field rotation
| When
you take multiple photos of sky on alt-az mount
or on static tripod, they usually suffer from
field rotation. It's caused by the fact that
stars seen from the Earth rotate around the
celestial poles. This effect may appear even when
you use an equatorial mount - when it is not
perfectly polar aligned. In the right picture you can see an
example of stack of 57 aligned frames (each with
exposure 8 seconds). The frames were taken by
Nikon Coolpix 995 digital camera fixed on static
tripod (Sagitarius area).
The effect of the field rotation is clearly
evident. The alignment point was selected in the
left bottom part of the frame. The stars near the
alignment point are point shaped, but the more
distant stars form arcs.
|
|
The following tutorial uses a sample AVI file compressed
by lossy DivX codec (to make the sample AVI file size
smaller for downloading). The original file was captured
by Lumenera Lu075M camera in K3CCDTools in 12-bit mode (12-bit
monochrome AVI K3CC Codec). Thus the sample file quality
cannot be compared to the original 12-bit AVI file. But
for explanation of using the Field Rotation filter it's
sufficient. You can save the sample AVI by using the
right click browser menu on the AVI link.
BTW, you are welcome to look at my very simple Lumenera deepsky setup.
Step
by step procedure:
1. Load the sample sequence M31Lum_05000ms_06-09-15_0000_divx.avi
2. Load the Dark frame M31Lum_05000ms_06-09-15_0001_DF_48b.png
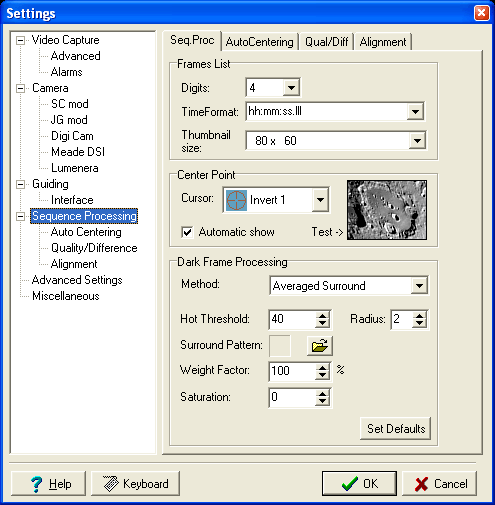
3. Check your Dark frame processing settings. I
usually use the Averaged Surround method:
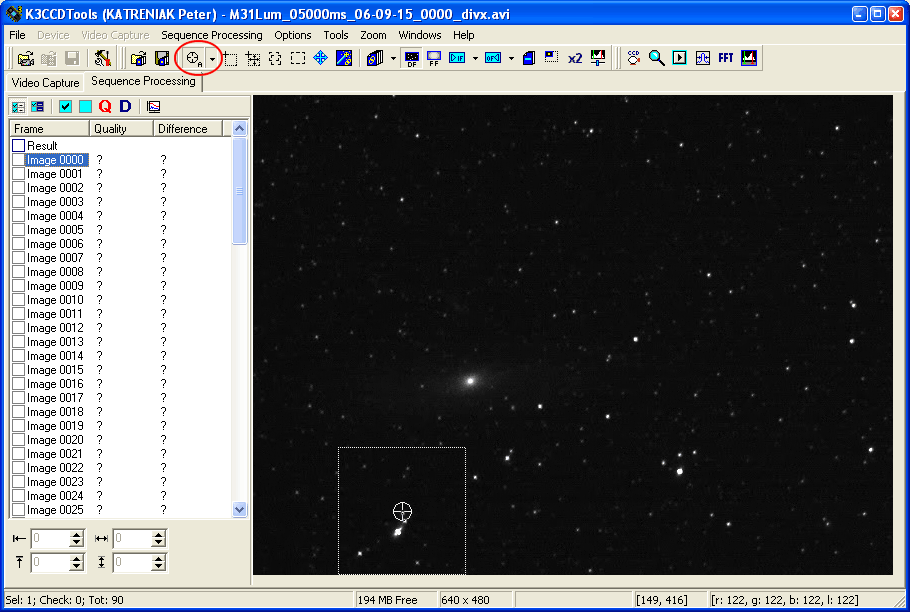
4. Choose the "Select center point (FFT)"
tool (using the main toolbar  button) and select the
first center point for automatic alignment. button) and select the
first center point for automatic alignment.
The best way is to select it at one of the corners of
frame (e.g. in the bottom left corner).
In this example I used FFT size 128 pixels. I selected
the point [149, 416]:
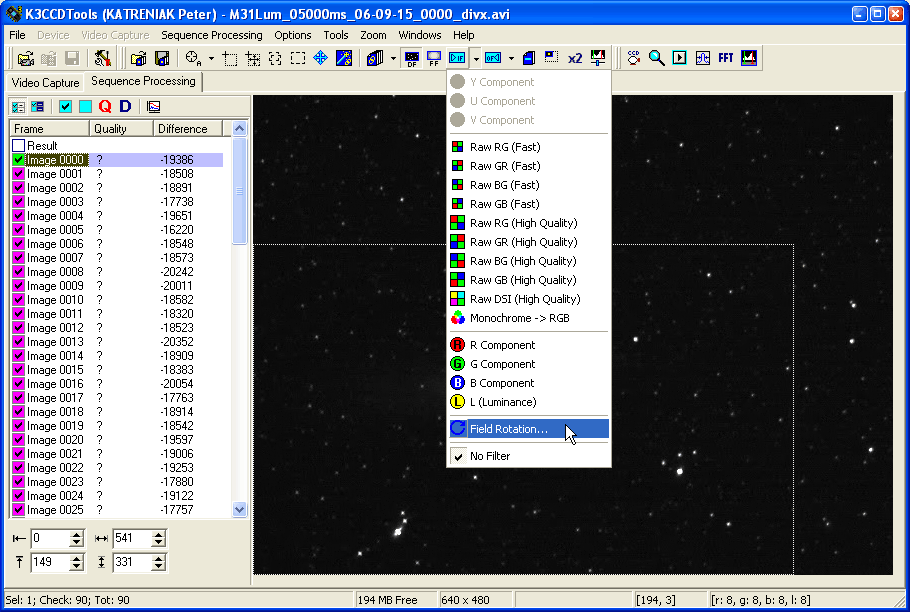
5. When the 1st center
point is calculated, select the Field Rotation Filter (using
the Input filter toolbar  button): button):
6. In the Field
Rotation Input Filter dialog press the  tool button (step 1). It will
calculate the rotation center for all frames: tool button (step 1). It will
calculate the rotation center for all frames:
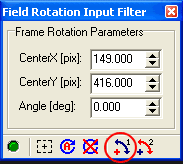
Note: For proper calculation the filter must be still
deactivated (the left bottom green LED is off).
7. Now choose again the "Select center
point (FFT)" tool (using the main toolbar  button) and select the
second center point for automatic alignment. button) and select the
second center point for automatic alignment.
The best way is to select it on opposite side of the
frame (e.g. in the upper right corner). The longer the
distance between the 1st and 2nd center points, the
better the acuracy of calculation of the field rotation.
I selected the point [455, 179]:
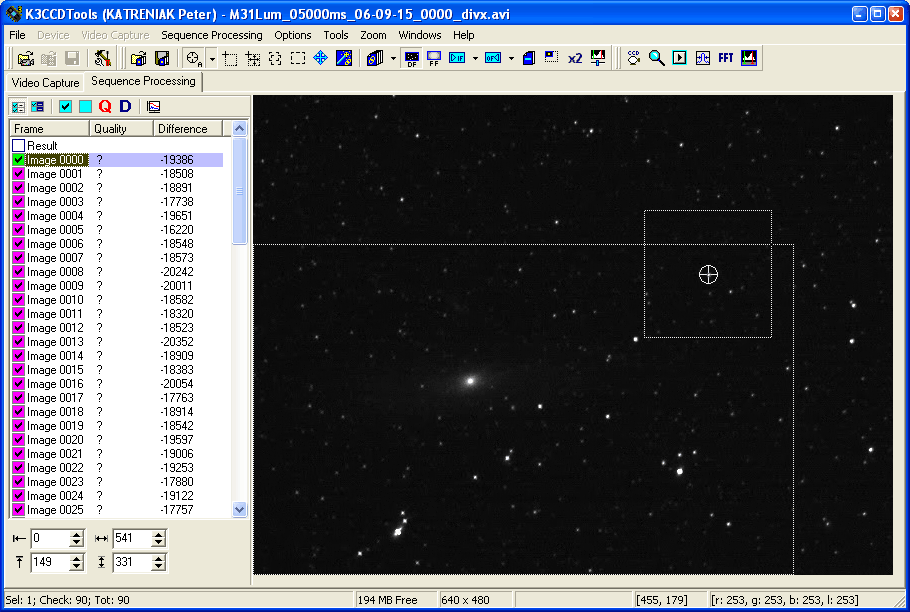
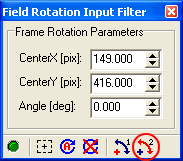
8. When the 2nd center point is calculated,
press the  tool button (step 2) in the Field
Rotation Input Filter dialog. It will calculate the
rotation angle for all frames: tool button (step 2) in the Field
Rotation Input Filter dialog. It will calculate the
rotation angle for all frames:
:
Note: For proper calculation the filter must be still
deactivated (the left bottom green LED is off).
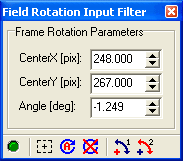
You can check that the calculation
is OK by selecting the last frame (Image 0089) in the
frame list. You should see its rotation angle - it is -1.249°
in our case:
Note: Don't forget to return to the first frame (Image
0000) after checking the rotation angle for the last
frame.
9. Now the rotation is calculated for all
frames so we can activate the Field Rotation
Input Filter by pressing the left bottom green LED tool
button:
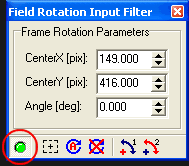
Now the field rotation is corrected
and the sequence behaves like it had no field rotation.
Of course, only while the Field rotation filter is
active, so all further operations are done with the Field
rotation filter active.
10. Now it's time for the definite frame
alignment. Choose again the "Select center point (FFT)"
tool (using the main toolbar  button) and select the
definite center point for automatic alignment.
It should be situated on the object which is the most
important for you. button) and select the
definite center point for automatic alignment.
It should be situated on the object which is the most
important for you.
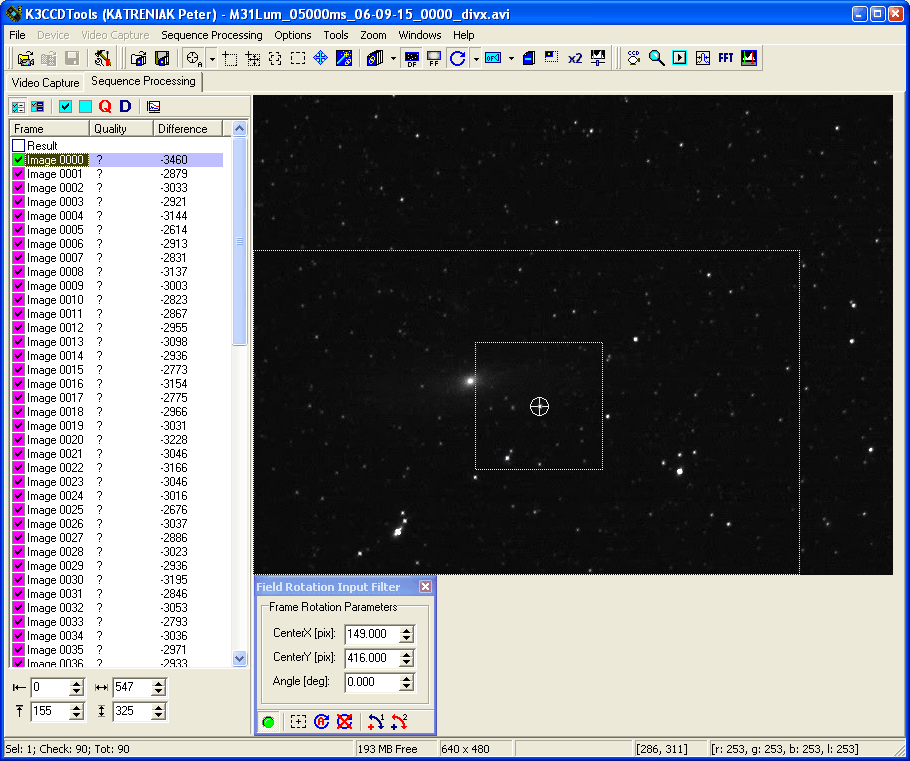
In our case I chose the star [286, 311] near the galaxy
center:
11. At this step we can do a fine
alignment. We just select a small rectangle
around the alignment star using the Select Result
Rectangle tool button  . We can do it in higher zoom
level: . We can do it in higher zoom
level:
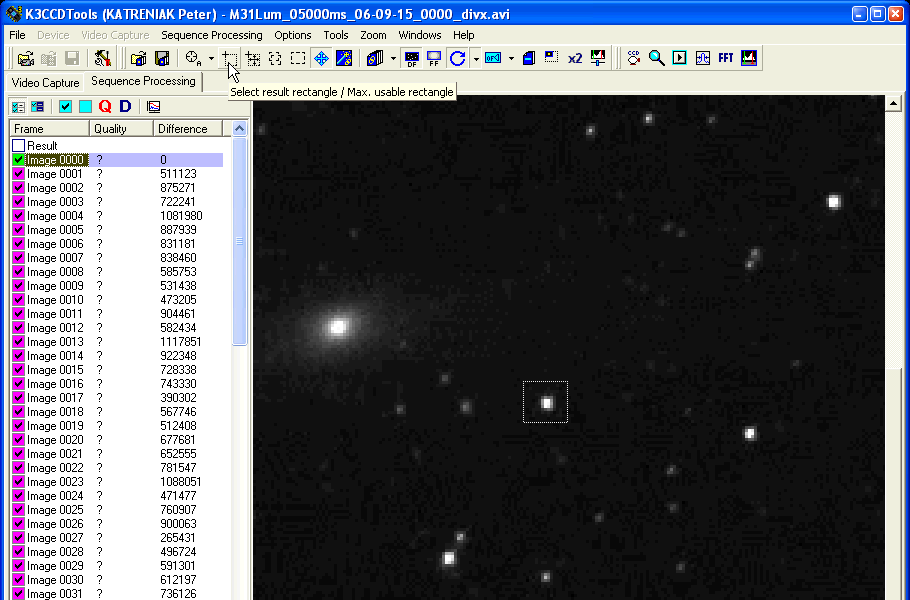
Note: This zoom level also reveals the compression
artifacts of the DivX codec used for compressing the
sample AVI file.
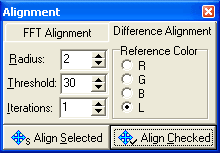
Then we do the fine alignment by
using the Alignment tool  - the Difference alignment. Set
the sky background level as threshold and press the Align
Checked button. - the Difference alignment. Set
the sky background level as threshold and press the Align
Checked button.
At the end we must maximize the
frame rectangle by right-clicking the  tool button. For even better
result we can use also the X2 mode, but at this example
we don't use it. tool button. For even better
result we can use also the X2 mode, but at this example
we don't use it.
12. The last but one step is to stack
the sequence by using the Calculate
result image (Sum) toolbar button  . .
We can save the all frame alignment parameters to a
project file (e.g. for later use) by using the menu
Sequence Processing - Save Project...
13. The final step is to do some post
processing by using the Post-processing
toolbar button  . .
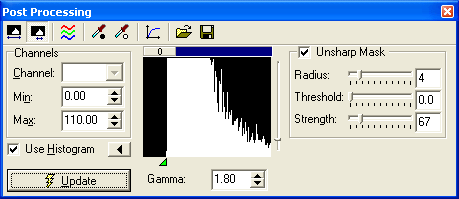
And here is the result image. Just
for comparison, on the right side you can see the result
image when the original uncompressed 12-bit AVI file was
used:
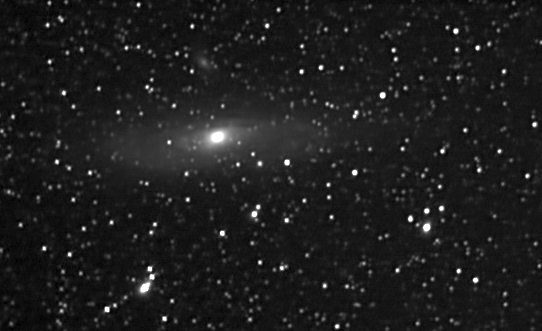
Stack result with DivX Sample |
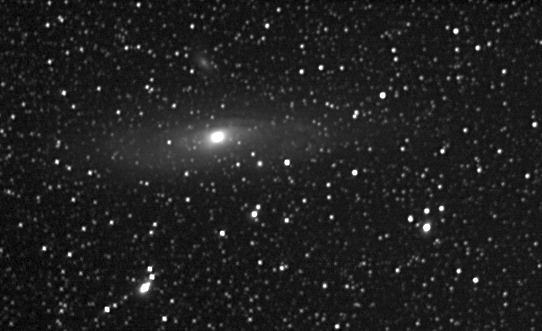
Stack result with the original 12-bit AVI |
Note: The DivX and the original
12-bit sequences were processed with exactly the same
parameters.
You can also try what becomes when the field rotation
filter is switched off (just switch off the green LED
button in the Field Rotation Input Filter dialog) and
stack the frames again.

Field Rotation Input Filter ON |
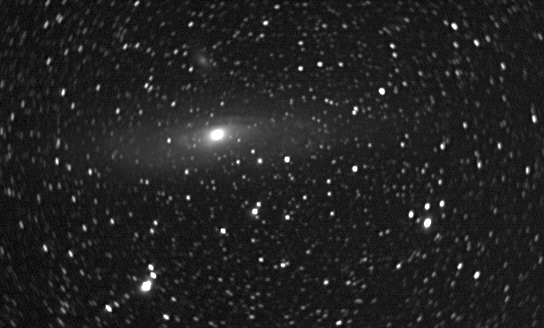
Field Rotation Input Filter OFF |
The effect of using the
Field Rotation filter is clearly visible.
We can explore the effect of the
Field Rotation Input Filter also by using the Zoom tool:
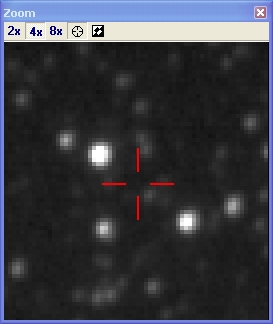
Field Rotation Input Filter ON |
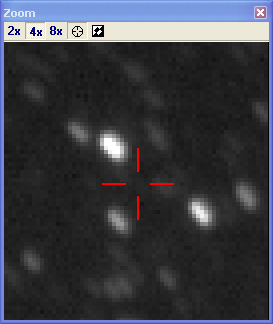
Field Rotation Input Filter OFF |
Notes:
- In our example we used the
frame "Image 0000" as the reference
frame for alignment. You can use any frame as the
reference frame (you should select the frame with
the best quality)
- You can save the stacked image
to any 16-bit image format (PNG16, TIFF16, FIT16/32)
and do the final post-processing in your
favourite image processing program (e.g.
Registax, Photoshop). You can also use a combined
method - do some post-processing in K3CCDTools in
Post Processing dialog and final post-processing
in other program
- You can store your sequence
processing alignment settings by using the menu
Sequence Processing - Save Project... command.
The project file stores all alignment and
rotation properties for all frames
- When you open the sequence
again later, set the darkframe and load the
project file (by using the menu Sequence
Processing - Load Project...), don't forget to
activate the Field Rotation Input Filter if you
want to use it - just open the Field Rotation
Input Filter dialog and press the green LED
button - all rotation settings are already
reloaded from the project file.
Back to K3CCDTools
- FAQ & How To page
Computer generated
images, real images, drawings and texts are property of
the author and may not be reproduced or used without
permission of author. The Jupiter images are property of
Christopher Go.

Last
Update: 21.12.2006
|